Creating a PostgreSQL Database in RONIN
We previously blogged about installing MySQL on a RONIN machine. But databases are different, and another open source database that is popular among researchers is PostgreSQL. This blog post teaches you how to install and connect to a PostgreSQL database with RONIN.


We previously blogged about installing MySQL on a RONIN machine. But databases are different, and another open source database that is popular among researchers is PostgreSQL. For a comprehensive comparison of MySQL and PostgreSQL see here. If you don't have vast experience with MySQL or PostgreSQL you are probably following instructions for installing some other piece of software that recommends one or the other. If you want to set up a PostgreSQL database and connect to it, read on.
There are basically two steps to using a database. First, you create the PostgreSQL database on a machine. Then, you connect to this database (here we will use a friendly graphical tool called pgAdmin). Often you will connect to your database from a different machine to protect the database from anything you do on the administrative side. However, if you want to keep things simple, you can also store and connect to your database on a single machine. We present both options below.
You can create and configure a PostgreSQL server and/or pgAdmin client following the steps below and make it available to all of your users via the RONIN Package Catalogue!
Step 1. Installing PostgreSQL on the Database Server
Create an Ubuntu 20.04 machine to run PostgreSQL. It should have a large enough root drive to store the data that you intend to analyze. Remember that with RONIN it is always easy to increase your storage or change your instance type later; you can start with a small general purpose instance for now.
Once your machine is running, use RONIN Link or ssh to connect to your machine's terminal.
Install PostgreSQL using the APT package manager:
sudo apt install postgresql postgresql-contrib
sudo systemctl enable postgresql.service
sudo systemctl start postgresql.service
This will create a user on the system called postgres. To continue to configure PostgreSQL, become this user as follows:
sudo -i -u postgresNow, as the system user postgres, run the command createuser --interactive -P to create a PostgreSQL user called ubuntu (you will need to enter this role name). You will need to set a password and specify that the role should be a superuser (y). This will also create a database called ubuntu for that user:
postgres@ip-10-0-3-111:~$ createuser --interactive -P
Enter name of role to add: ubuntu
Enter password for new role:
Enter it again:
Shall the new role be a superuser? (y/n) yYou will need this password in Step 3.
Step 2. Installing pgAdmin
If you were following along above, make sure to type exit so that you are user ubuntu before beginning the pgAdmin installation as follows:
#Install CA Certificates
sudo apt install ca-certificates

#Add the public GPG key for pgAdmin
curl https://www.pgadmin.org/static/packages_pgadmin_org.pub | sudo apt-key add

#Add the pgAdmin APT repository
sudo sh -c 'echo "deb https://ftp.postgresql.org/pub/pgadmin/pgadmin4/apt/$(lsb_release -cs) pgadmin4 main" > /etc/apt/sources.list.d/pgadmin4.list && apt update'

# Install pgAdmin4
sudo apt install pgadmin4
After installing pgAdmin, execute the following script to set it up:
sudo /usr/pgadmin4/bin/setup-web.sh
You will be prompted for an email address, a password, and asked if you want to configure the Apache Web server (you can answer yes).
Because we have not configured email on the machine, recovering your password from the pgAdmin screen will not work.
Now you can access the pgAdmin interface from a browser. There are two ways to do this:
PgAdmin Access Option 1. Link to Port 80
Use RONIN LINK to securely tunnel to pgAdmin from your local computer (your laptop or desktop).
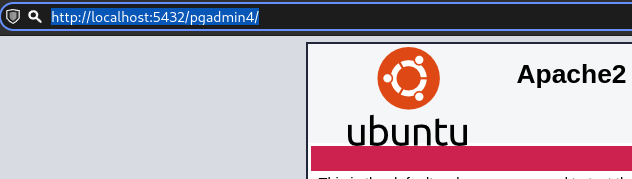
First open RONIN LINK and enter the port number 5432 for local port and 80 for remote port in the "Link to a Custom Application" box. Then click "Link".

This will open a tab on your browser with a default screen for Apache. This indicates that the Apache browser is working. Now to navigate to the pgAdmin console, enter /pgadmin4 after the path shown in the browser window.
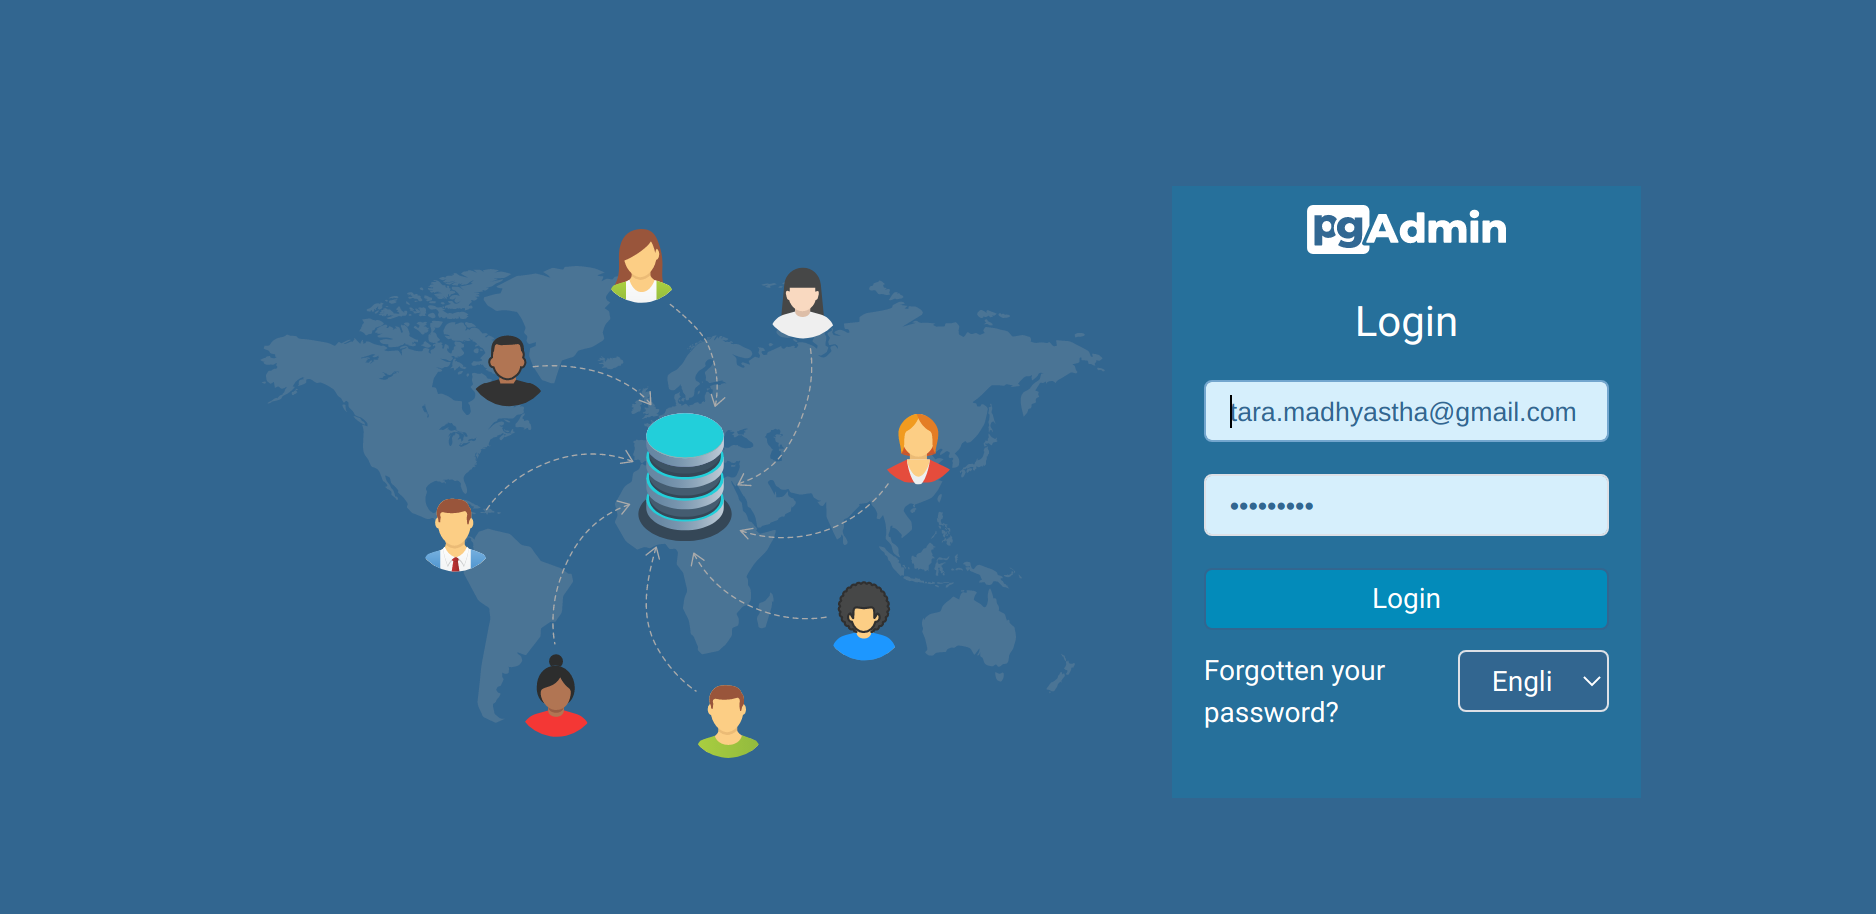
This will bring up the pgAdmin login screen as below. To log in, enter the email and the password you provided upon configuration.
PgAdmin Access Option 2. Remote Desktop
Here we use RONIN LINK not to connect directly to the pgAdmin interface, but to bring up a remote desktop to the machine we created, where we can get to pgAdmin from a browser.
Open RONIN LINK and connect using a desktop.
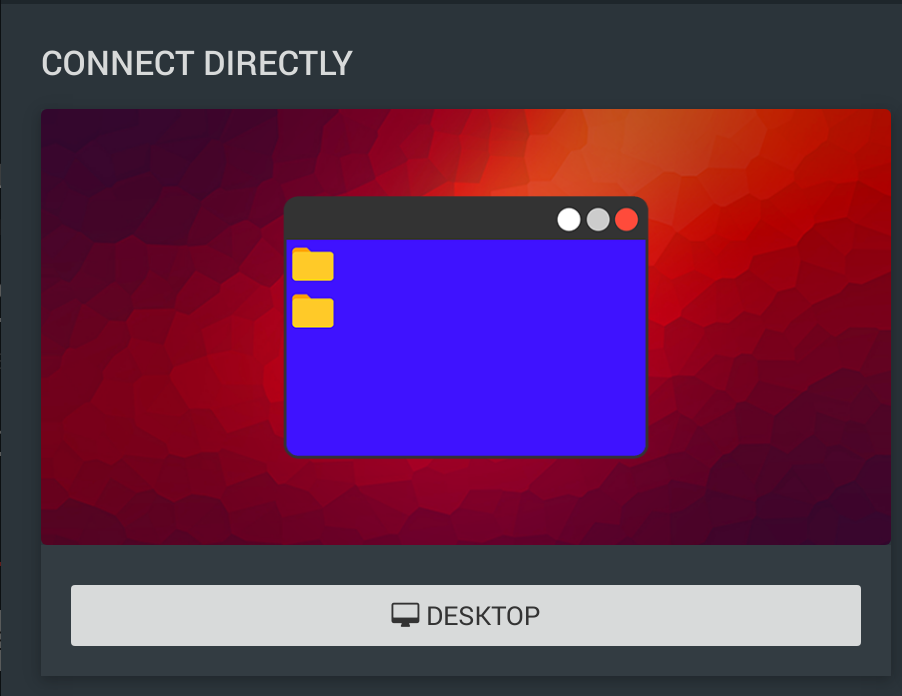
This will ask you whether you want to install NICE DCV (the software used to create a remote desktop). Answer yes. This will install and configure all the software for you. And then it will bring up a remote desktop to your PostgreSQL machine.
From the desktop, open a browser. In the browser window, type http://localhost/pgadmin4 to get to the pgAdmin login screen.
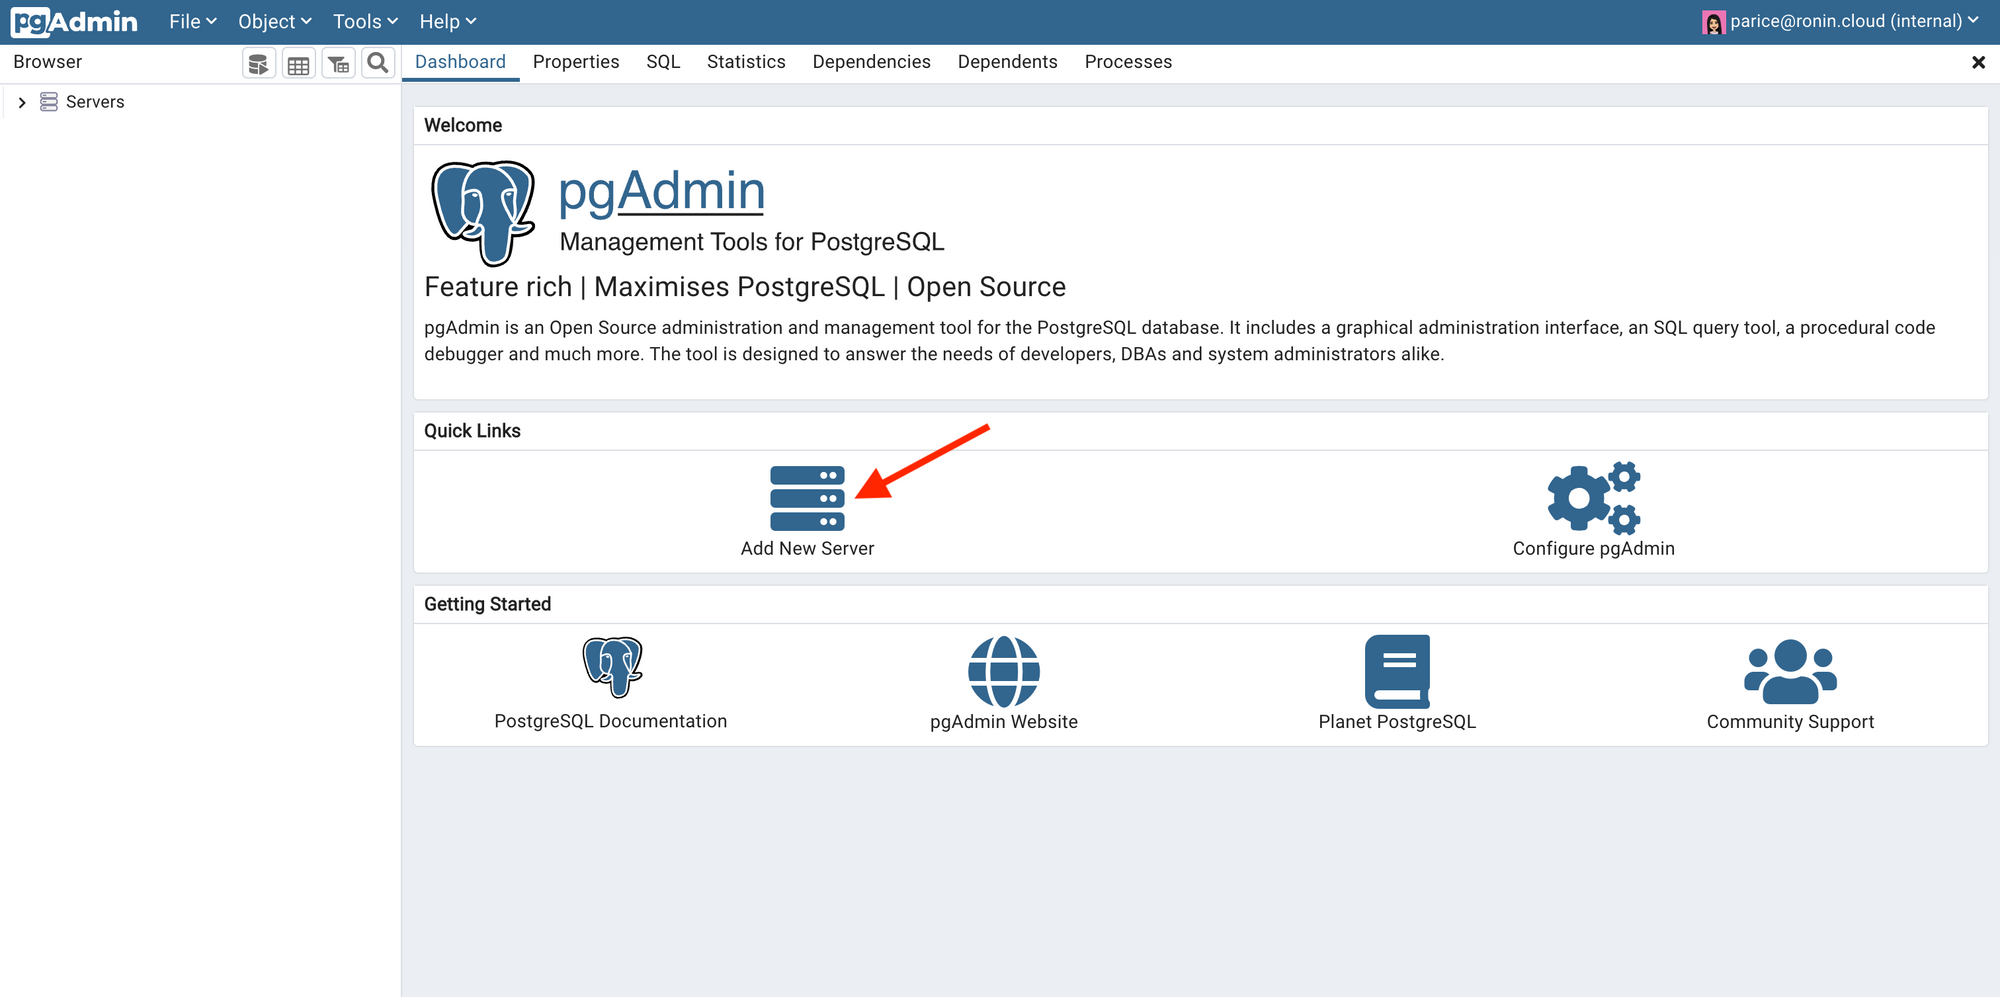
Step 3. Connecting to your PostgreSQL Database
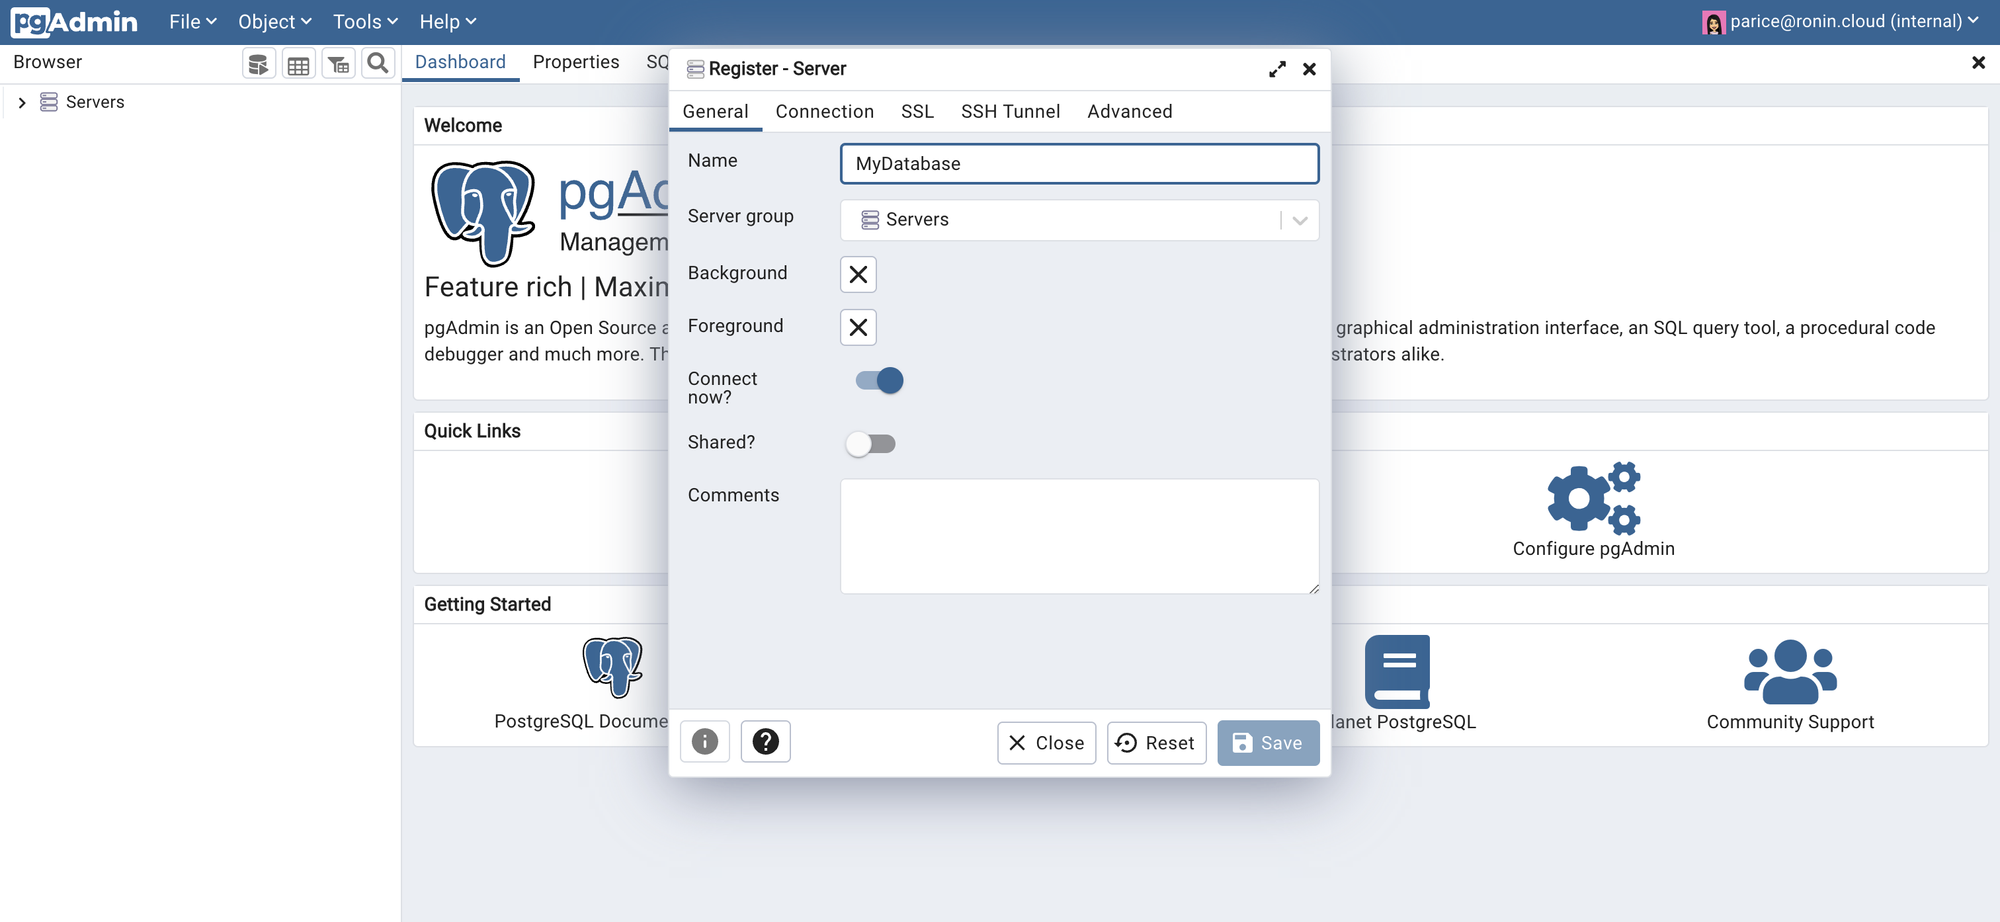
Once you have logged in using the email and password you set up earlier, select "Add New Server":
Enter a name for your database:
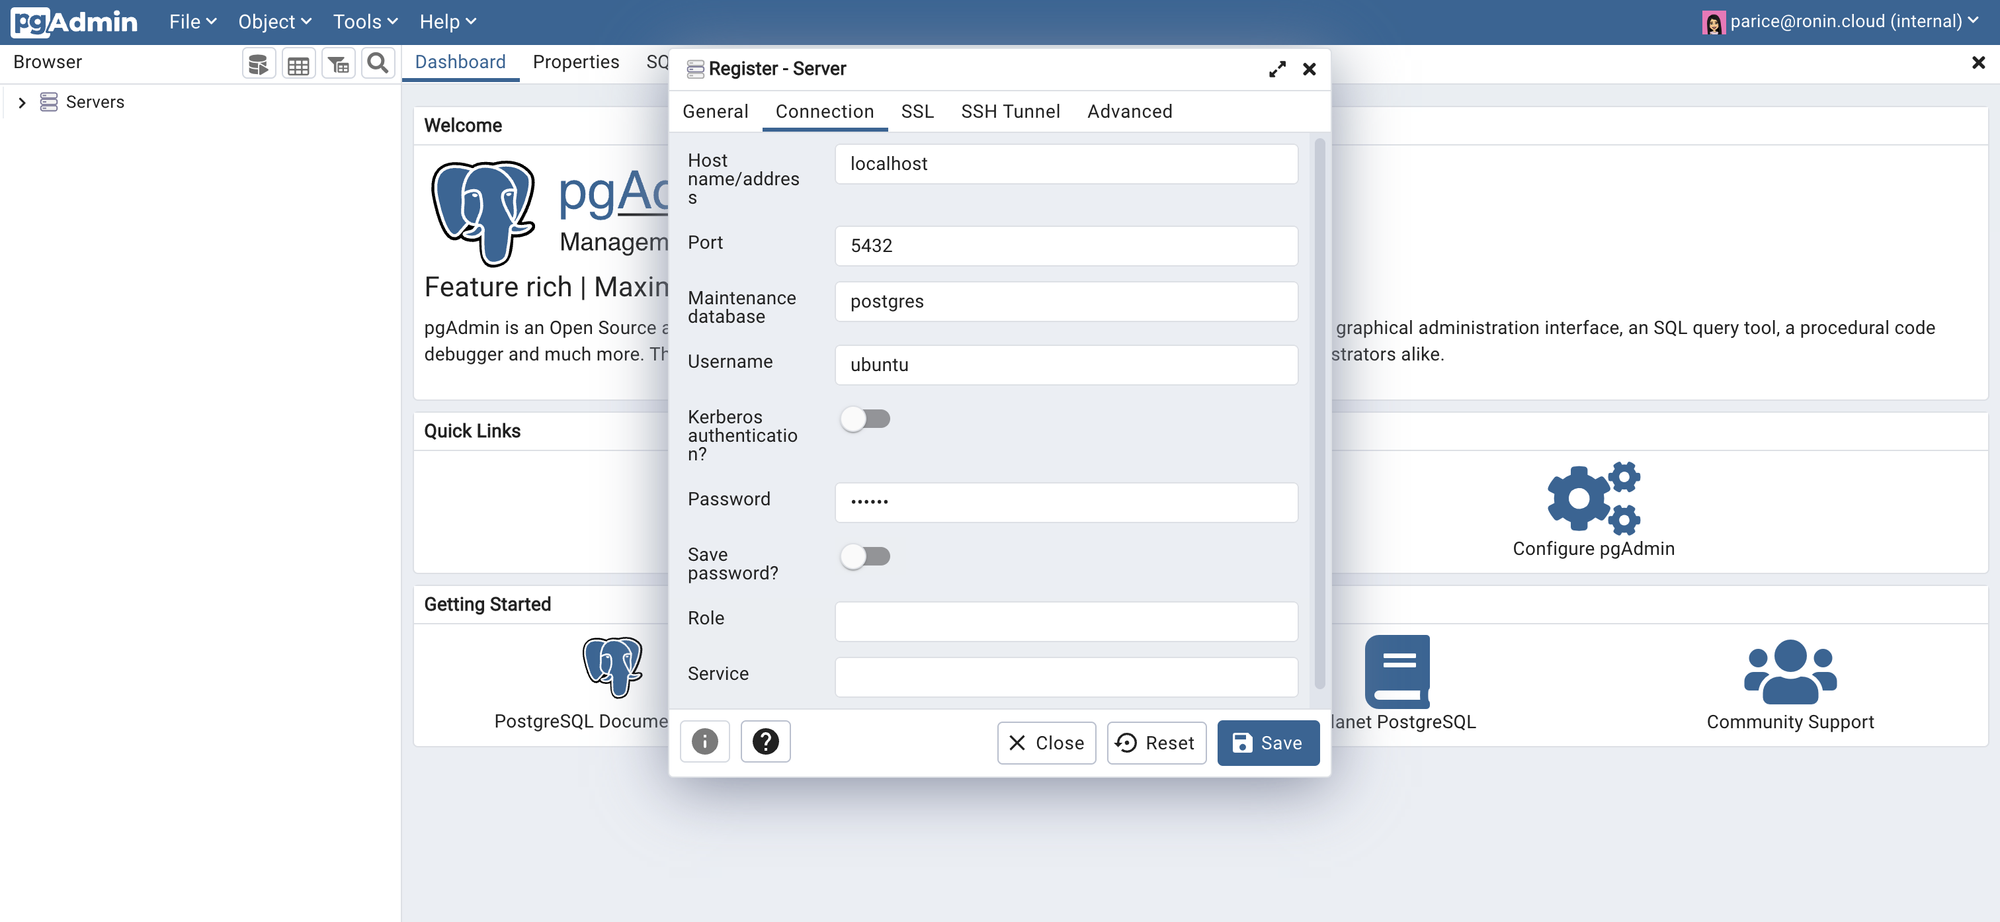
Then move to the Connection tab and enter "localhost" for the host name/address, change the username to "ubuntu" and specify the password you set for the ubuntu PostgreSQL user earlier:
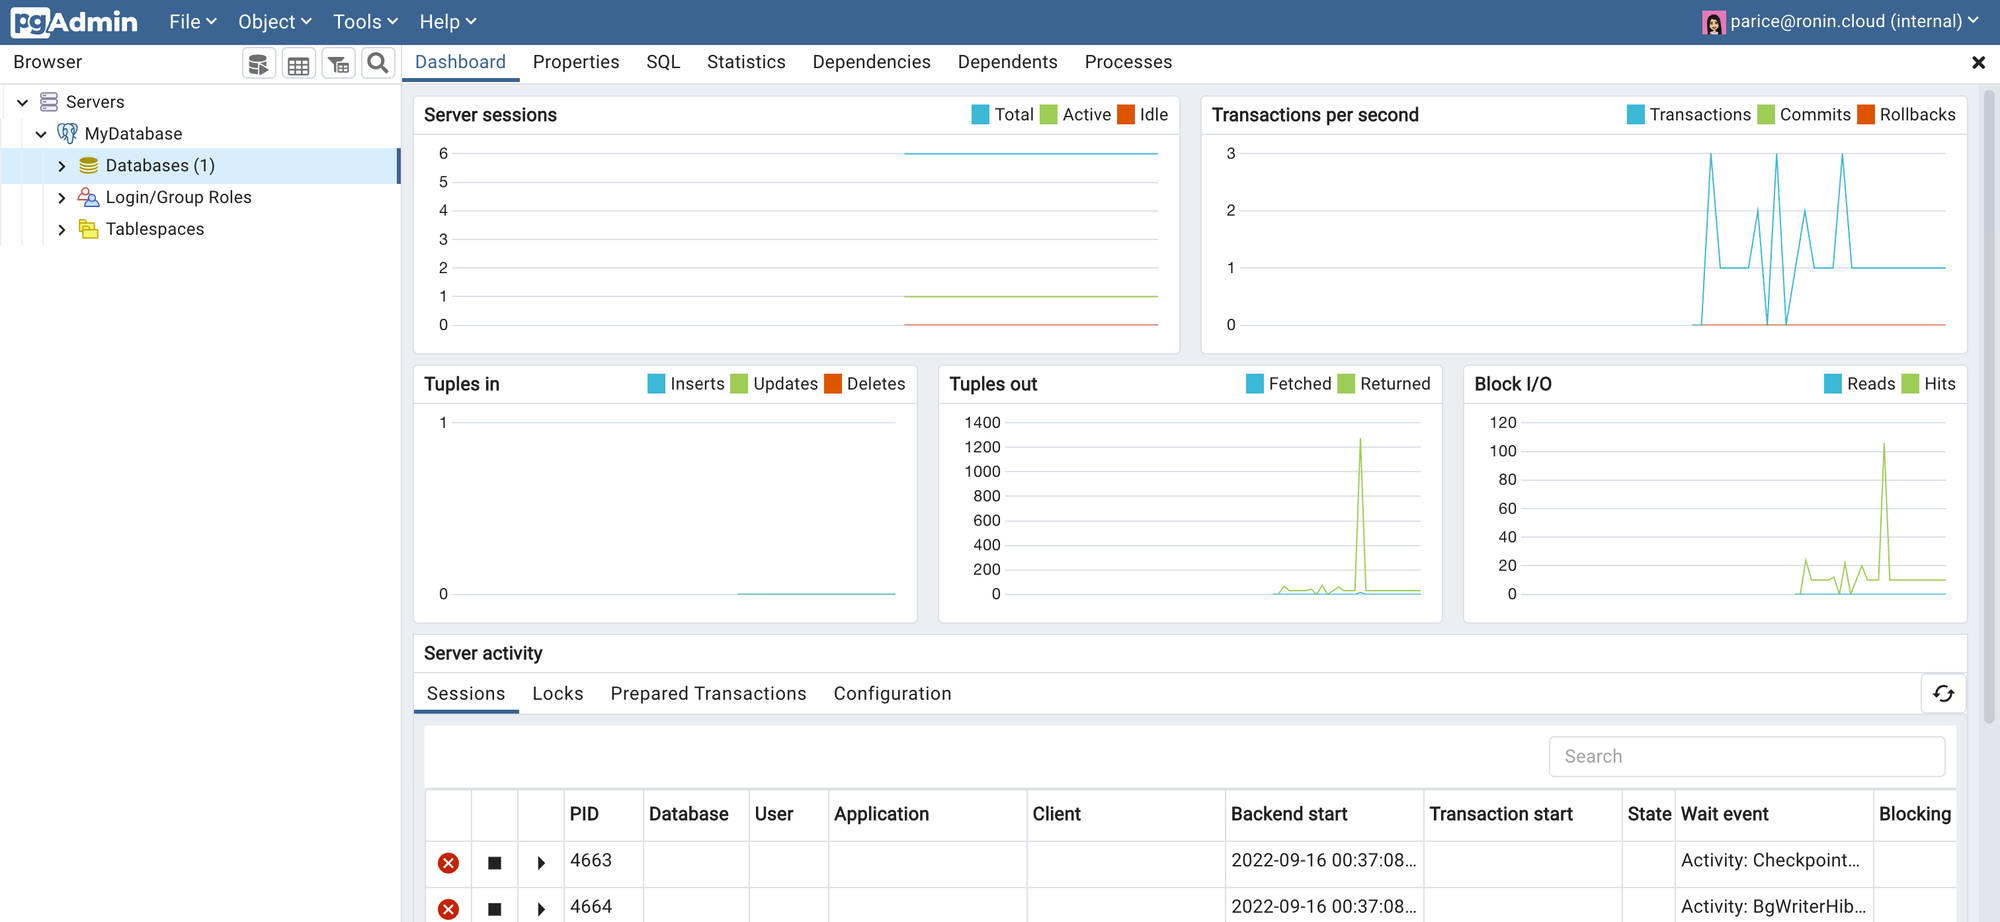
PgAdmin4 should then successfully connect to your database:
You are now ready to start adding and querying your data! You might want to read through some tutorials to help you get started. Here are two we recommend:
- https://linuxhint.com/pgadmin4_tutorial_beginners/
- https://learnsql.com/blog/how-to-import-csv-to-postgresql/
Step 4. Connecting to your PostgreSQL Database From Another Machine (Optional)
In the steps above we showed you how to connect to your PostgreSQL database from pgAdmin that was also installed on the same machine. But you can also connect to your database from pgAdmin installed on another machine (or even your own personal computer / laptop).
Once you have installed pgAdmin on the desired machine and logged in, click "Add New Server" and fill in the required details in the "General" and "Connection" tab as in Step 3. Then navigate to the "SSH Tunnel" tab, click the slider to "Use SSH Tunnelling", and fill in the following details:
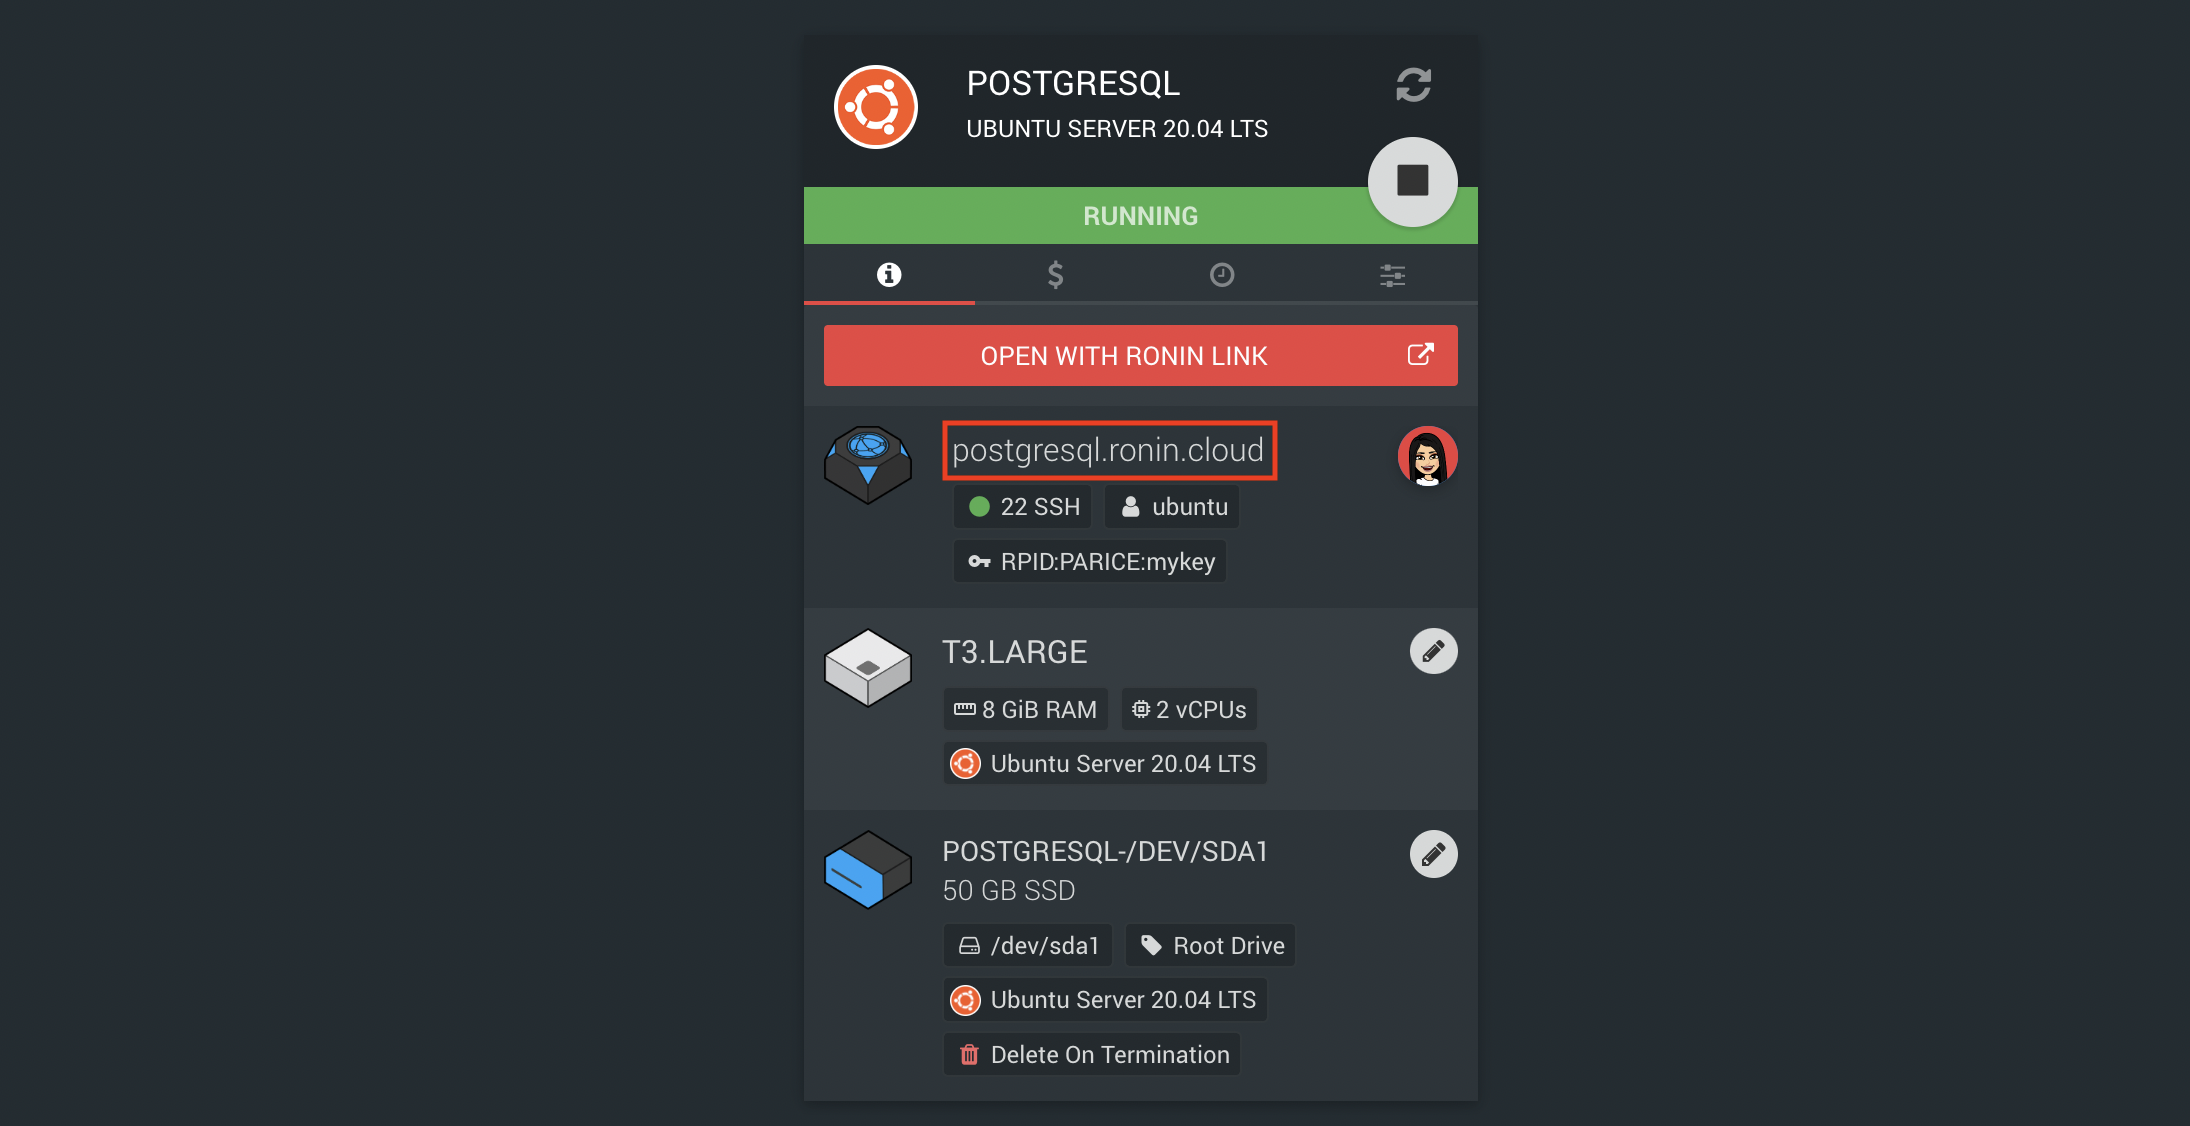
Tunnel Host: The address of your RONIN machine where you installed PostgreSQL - you can find this from the machine summary screen in RONIN. In this example the host name/address would be postgresql.ronin.cloud:
Username: Ubuntu (for Ubuntu OS)
Authentication: Identity file
Identity File: You will need to make sure the key file that you use to connect to your PostgreSQL machine is available on the machine where pgAdmin is installed so that you can then select the key in this step.
Click Save and if all the details are correct, pgAdmin4 should then successfully connect to your database!
Some Final Points
RONIN provides a simple way for you to configure, manage and connect to your own database servers. It ensures that the database cannot be accessed without that SSH key (which you can delete at a moment's notice), so it is well secured. You can leverage RONIN features such as Smart Schedule to turn your database server off when you aren't using it, and Backups to back it up when you need to. No matter what method you choose, you will always need to make sure your database has enough memory and CPU power to handle incoming requests, and in RONIN you can monitor that with Netdata.