Version Control of Your Scripts with Git
Git is an essential version control tool for anyone who writes their own code or scripts. This blog post will give you a simple introduction to the beginner fundamentals of Git.

If you have worked with command line programs before, chances are you have heard of Git or at least visited GitHub and wondered what it was all about. This blog post is a simple introduction to the beginner fundamentals of Git so that you can get started with version control of your scripts.
So what is Git?
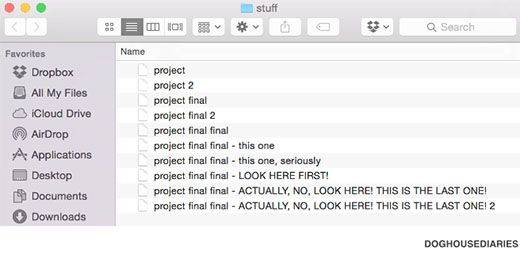
Put simply, Git is version control software that can be used to help you manage and keep track of changes made to files (primarily scripts and other files with code). Git watches all of the changes you make to your code allows you to save progress on your scripts as a snapshot in time (a.k.a a "commit" in Git terminology) that you can always refer back to if needed. For example, you may have a script that you have written for a particular analysis and you make some changes and realize that your script no longer works. With Git you can easily restore your script from the point where it was last working (i.e. saved as a version with a "commit"). Or, you might just want to see a particular option or function you used in a previous run that you later removed, or you accidentally deleted some important code and need it back. Although Git can get complicated very quickly, especially when you are working on large software projects with many collaborators, at a basic level (like we cover in this blog post) Git is simple to use and can save you a lot of headaches... like the one below!
Then what’s this thing called GitHub?
GitHub is an online repository hosting service where you can store and share your Git repositories. You do not necessarily need GitHub to use Git - you can just work with your own Git repositories locally. However, GitHub is a safe place to keep your code that is not your own computer, so it is less likely that you or anyone you work with will lose your code. Aside from the ability to easily share and collaborate on your code with GitHub, GitHub also offers some other nice features such as the ability to more easily compare changes made to code, edit your code, search your repositories, make comments, create and track issues, host web sites and even create Wikis for your code. However, if you just want to keep track of some of your script files in one place and don't need anything extravagant, GitHub may be unnecessary overkill. We'll leave that decision up to you!
How can I use Git to keep track of my code?
First off, you need to download and install Git - head here to Download Git for your operating system: https://git-scm.com/downloads
You will then need to launch a terminal to run Git commands. The first thing you should do is set your identity, as this information is used to keep track of your activity within Git repositories:
git config --global user.name "John Doe"
git config --global user.email johndoe@example.comNote: You will only need to do this once, because the--globalflag will set these details as the defaults. If you need to override this information for a particular project, you can just run the above commands again in the respective project folder without the--globalflag.
To create your first Git repository, navigate to the folder where you would like to keep all of your scripts for a particular project and run:
git initNote: You can set up multiple repositories for each project or workflow as required - just run the above command in each respective folder.
You can then add your scripts and other files to this folder. Git will only track the files that you want it to track (i.e. watch any changes that have been made to a file). To tell Git to start tracking a particular file so that you can manage changes and save different versions, run:
git add <myscript.sh>Replace myscript.sh with the name of the file you wish to track. This tells Git to add that file to the "staging area" where Git will watch any changes you make to that file until you are ready to save them. You can add as many files as you like from your folder to the staging area and Git will watch all of them for you.
To see which files Git is tracking (or not) in your folder and whether changes have been made to these files run:
git statusYou should see a list of any untracked files as well as your tracked files and whether any changes have been made to these files.
When you are happy with the changes you have made to your tracked files and want to save a "version" of that particular file (as well as any other files you have added to the staging area) you will need to "commit" these changes by running:
git commit -m "Added my script file"Replace Added my script file with a description of what you have done/changed since your last commit. This will save these files as a version you can always revert to if needed (see next section below).
Note: Any changes that are made to files in your staging area are not saved to your Git repository until you commit them! This means you should aim to commit your changes frequently and write helpful descriptions in case you ever need to revert back to a particular commit.
Once you are familiar with these basics and feel more confident to dive into more complex features such syncing repositories with GitHub, as well as managing branches, pull requests and merges etc, check out this great online tutorial for further details.
What if I have made a mistake and need to go back?
So your cat jumped on your laptop when you weren't looking and managed to delete a very important chunk of your script that you then saved accidentally ... uh-oh! If you weren't using Git that section of code would be gone forever (and your cat would be in a lot of trouble), but luckily you are a conscientious Git user and made a commit (i.e. saved a version) of that file just a few days ago. Thankfully, Git makes it easy to revert your script back to that point in time and recover that section of code your cat rudely deleted without your permission - phew!
To revert back to a previous version of your code you just need to know the ID of the commit that you want to revert back to. To see a list of all of the previous commits you have made in your repository run:
git logFor each commit you will see the ID of the commit, when the commit was made and by whom, and the description of the commit.
To revert back to a particular commit, you have two options:
1. Revert back without keeping any changes i.e. a "hard revert":
git reset --hard <commitID>2. Revert back with keeping any changes i.e. a "soft revert":
git reset --soft <commitID>Replacing <commitID> with the desired commit ID from your log. A hard reset will destroy all changes since the named commit and completely set your repository back to the way it was when you made that commit. A soft reset will keep any changes since that commit in the staging area.
Note: The reset command should only be used for private repositories, please see information on the revert command if you are collaborating on a public repository.
Isn't there an easier way to use Git?
We believe the best way to truly learn and understand Git is by learning the actual Git commands first, but once you are comfortable with how Git works via the command line, there are many Graphical User Interface (GUI) clients that turn those Git commands into pretty buttons and make the Git experience much more enjoyable! For a comprehensive list see here, but our top pick is definitely GitKraken.
Now you know the basics of Git, the world of version control is your oyster - So Git going!