Automatically syncing scripts to your RONIN machine with Visual Studio Code
Did you know that instead of having to manually copy scripts and other files over to your RONIN machine each time you make changes, you can instead have all of your changes automatically synced as soon as you hit save!? Here we show you how with Visual Studio Code.

Many researchers like editing and testing scripts on their own personal computers, and copying them to RONIN machines or clusters when they need to run them on real data. If you have previously read our blog post on useful desktop apps for researchers you may already be using a code editor like Visual Studio Code for writing and managing your scripts on your personal computer (round of applause please). But did you know that instead of having to copy your scripts over to your RONIN machine each time you wish to run them, or whenever you make changes to your code, you can instead sync all of your changes automatically to that machine every time you hit that save button! Want to learn how? Follow the steps below:
1. Install Visual Studio Code
If you aren't already using a code editor to write your scripts, we highly recommend giving it a try! Visual Studio Code is one of the best code editors out there and it can be downloaded for free from: https://code.visualstudio.com/download.
2. Install the SFTP Extension
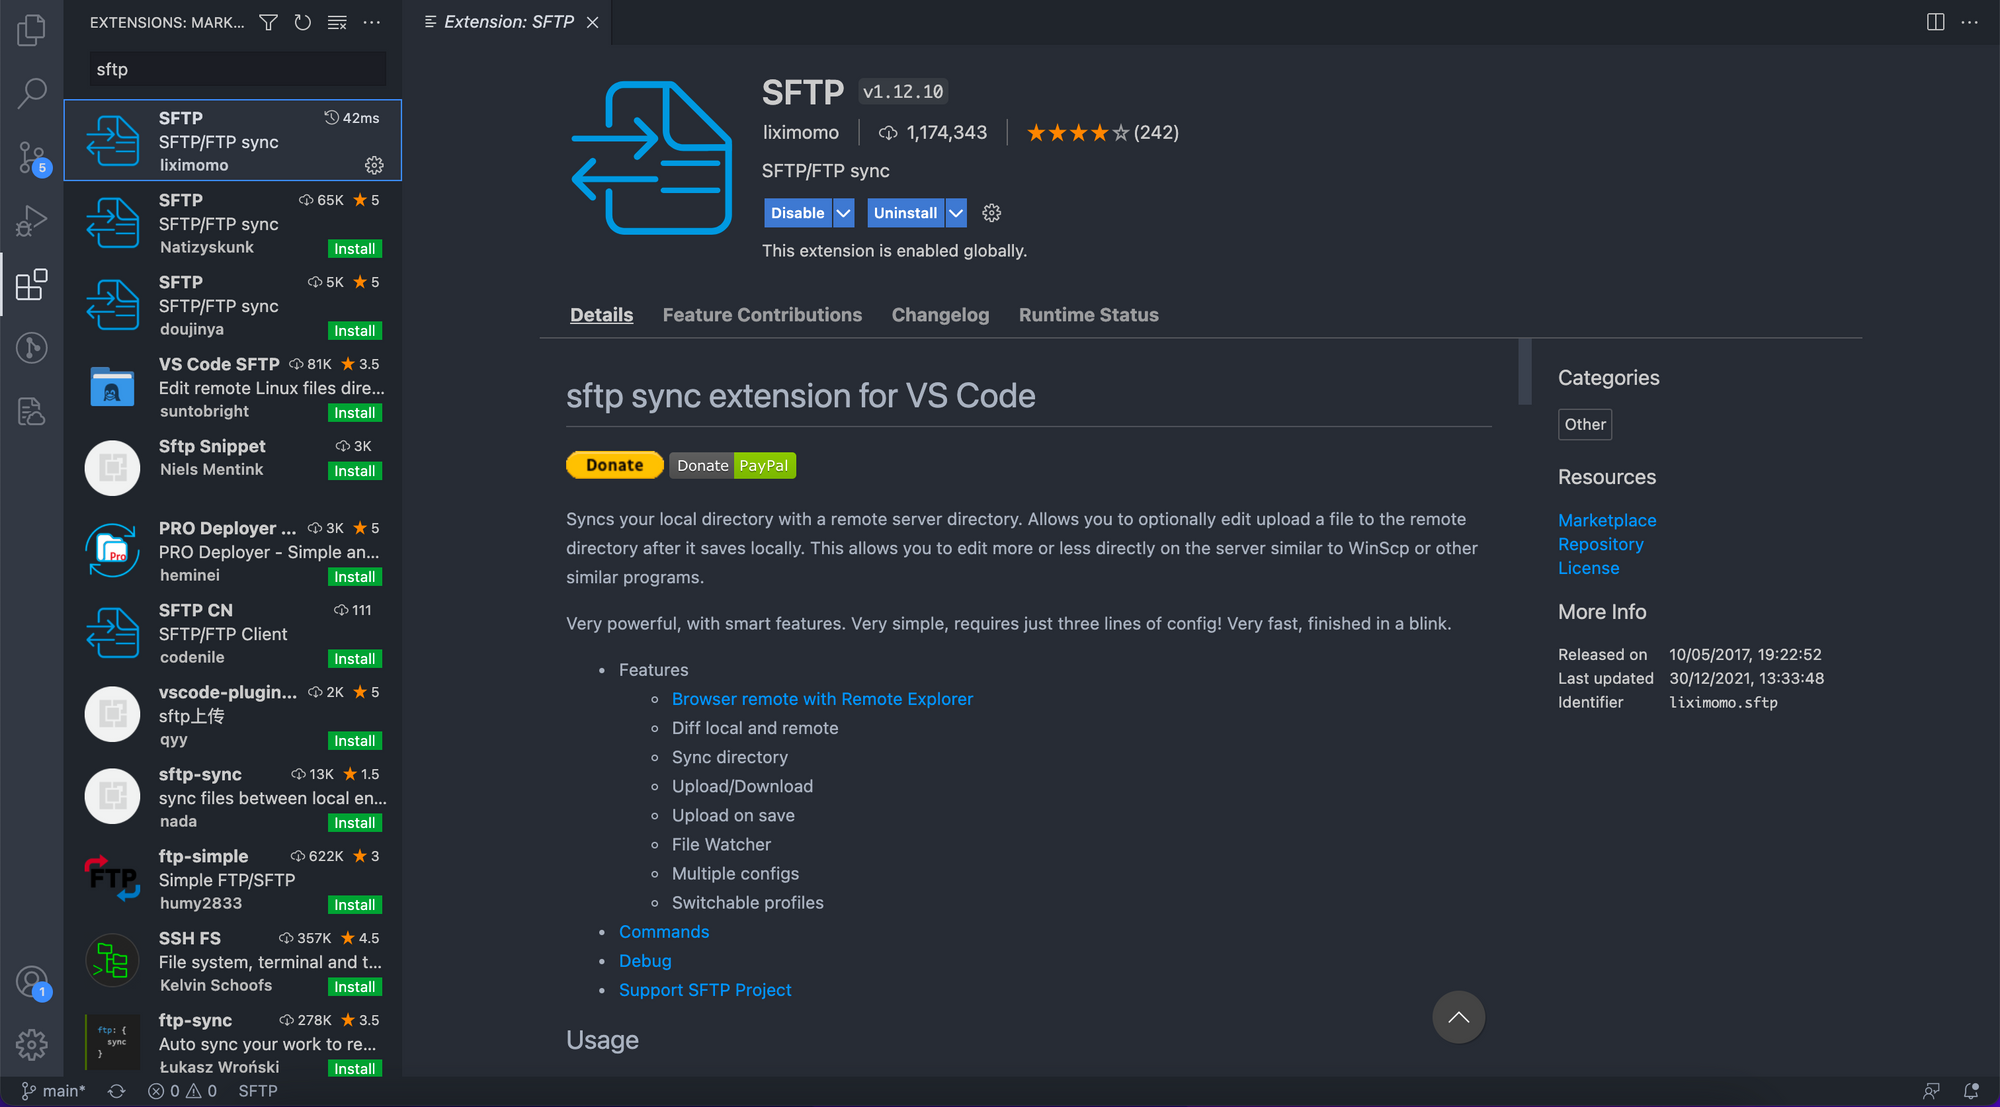
In Visual Studio Code, head to the Extensions tab in the left menu bar and search for "sftp". Then hit install on the Extension by liximomo:
3. Open Your Project
You should keep all of the scripts and other files that you wish to sync to your virtual machine in a single folder on your computer. Open this folder in Visual Studio Code (either via File->Open Folder or File->Add Folder to Workspace).
Note: You can begin with a new empty folder if starting a project from scratch.
4. Edit the SFTP Config File
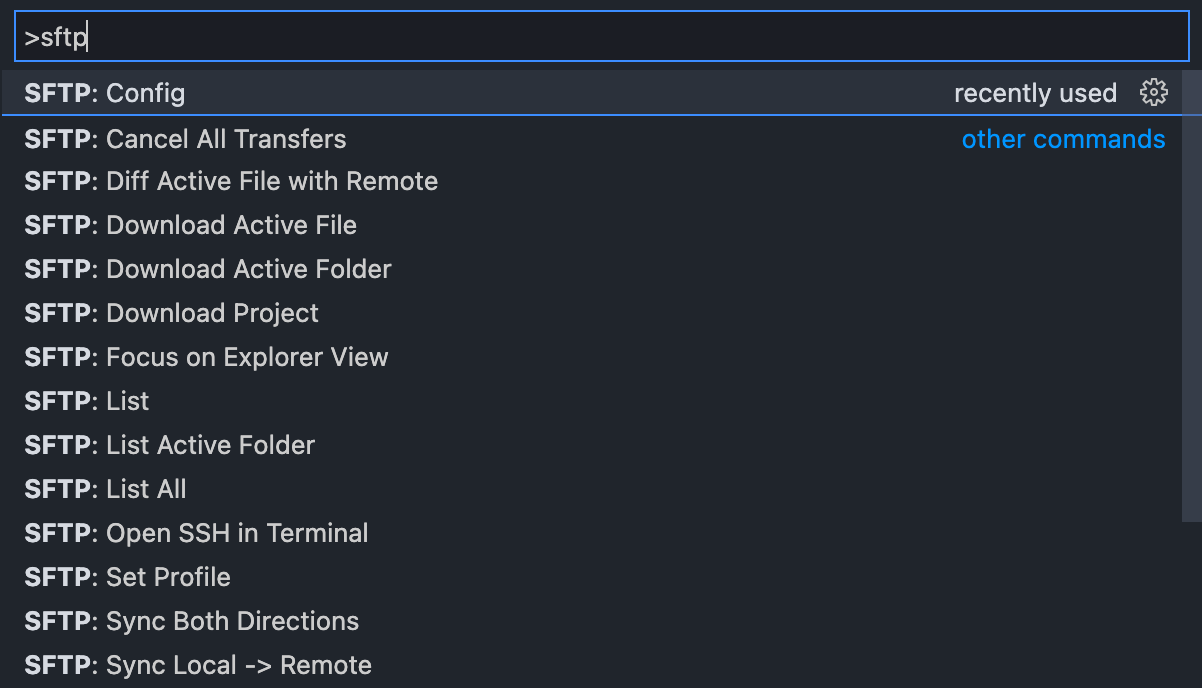
We now need to tell Visual Studio Code how to connect to the RONIN machine that we want the current project folder to sync to. To do this, open the command palette with Ctrl+Shift+P if you are on Windows/Linux or Cmd+Shift+P on Mac. Type in "sftp" and select "SFTP: Config". You may then need to select the correct project folder if you currently have multiple folders open in Visual Studio Code.
This will open a SFTP config file that looks something like this:
{
    "name": "My Server",
    "host": "localhost",
    "protocol": "sftp",
    "port": 22,
    "username": "username",
    "remotePath": "/",
    "uploadOnSave": true
}
You will need to edit this config file as follows:
- Replace name and host with your RONIN machine address (e.g.
mymachine.ronin.cloud). - Replace username with the default username for your machine. You can find this on your RONIN machine card. This will usually be
ubuntufor Ubuntu operating systems. - Replace remotePath with the desired path on your virtual machine where you would like your scripts and other files to be synced to. For example, to sync to your home directory on your Ubuntu machine you would enter
/home/ubuntu. If you encounter any "Permission Denied" errors in Visual Studio Code, you may need to ensure permissions are set correctly on this folder (see this blog post for help with folder permissions). - Set uploadOnSave to be
trueto automatically sync all your files to the virtual machine when you save them. If uploadOnSave is set tofalseyou will need to manually sync files (see Step 5 below). - Add the following line below the username line replacing the path to
mykey.pemwith the path on your local computer to the SSH Key you use to access the machine:
"privateKeyPath": "/Users/name/Downloads/mykey.pem",
Your new config file should now look something like this:
{
    "name": "mymachine.ronin.cloud",
    "host": "mymachine.ronin.cloud",
    "protocol": "sftp",
    "port": 22,
    "username": "ubuntu",
    "privateKeyPath": "/Users/name/Downloads/mykey.pem",
    "remotePath": "/home/ubuntu",
    "uploadOnSave": true
}
Save this config file. You can change this information at any time if you need to by navigating back to the config file through the command palette. If you have multiple projects, you can repeat this process for any other folders in Visual Studio Code.
5. Syncing Files
Say you add a new file to your folder, or edit some code in a script and want these new changes to appear on your virtual machine. If you enabled uploadOnSave in your config file, all you have to do is save your file in Visual Studio Code and the latest changes will automatically be sent to your virtual machine. If you did not enable uploadOnSave, you can sync these files by right clicking anywhere in the script, or on the file name, and then selecting the "Upload" option.
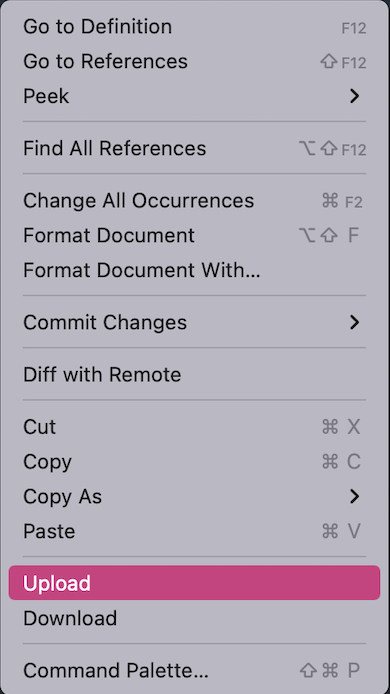
If you have changed files on your virtual machine and you want to pull those changes to your local computer, you can select the "Download" option.
Alternatively, to sync the whole folder, open the command palette and type "SFTP: Sync". You can then choose to sync the folder in both directions or only push changes to, or pull changes from, your remote virtual machine:

Note: Typing "SFTP:" into your command palette will show you all of the SFTP options available.
You can even view the files and directory structure of your remote path using the SFTP tab in the left menu bar.
And that's all there is to it. Super simple, but a little bit life-changing, just how we like it!